Showing posts with label Homemade Skin Care. Show all posts

Monday, April 30, 2012

All Natural Homemade Anti-Wrinkle Serum!!


The moment you've all been waiting for!! Magic in a bottle, well a half pint jar anyway! =) This is the recipe for the anti-wrinkle or anti-aging serum. Anti-Wrinkle creams or serums are by far the most expensive skin care product on the market. People pay hundreds, even thousands to attempt to get rid of any sign of aging, especially wrinkles. Women especially, will endure shots, surgery, and other painful and very costly procedures just to take a few years off their face. Sad, but true!

This serum is not my creation alone. I got the original idea from an episode of Renegade Health, one of my favorite sources for health, nutrition, proper eating, exercise, and healing. I changed the recipe as it made WAY too much at a time and I also added the Patchouli Oil to improve the aroma, and to add more anti-aging and moisturizing properties to it. However, you should click on the link as there is a video presentation on how to make the original recipe that also has lots of great info!

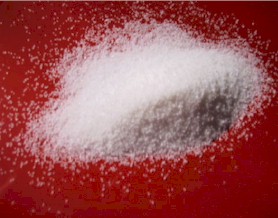
Start with what is shown above: Carageen Irish Moss, Truly Vitamin C, and Patchouli Oil. Please note that it is very important to not use just any Vitamin C. Click here to watch a very short clip on the importance of Vitamin C. Then please read the article below the video to understand the importance of a natural source of vitamin C.

Recipe

1/4 C. Irish Moss (dry)
3/4 C. Water
1 1/2 tsp. Vitamin C
10 drops Patchouli Oil

First Soak the Irish Moss in the water for 20 minutes.


Then dump the Moss and the soak water in the blender and blend for 40 seconds. Then add the vitamin C and blend for another 20 seconds. This works better in a Vita-Mix or Blentec. If you don't have either, you may have to blend it longer.


Pour into a glass container of some kind. I use a 1/2 pint jar. It will be a "serum" like consistency.
The serum should be stored in the fridge and will be good for 2-3 weeks. The picture below shows the gel like consistency it will turn into. Just rub the mixture between your fingers to soften it back into a serum. 

Rub the mixture into your face, neck, and hands (I stated in a post before that whatever I put on my face, I put on my hands and neck as well). You can just leave it on if you'd like, however it does dry like a mask almost. You can wash it off, or spritz it with water to re-moisten. It is not something you would want to put on under your make-up or go out with it on. It is perfectly ok to leave it on when going to bed.
Now for the fun part! I get to share with you all the benefits of the Irish Moss, Vitamin C, and Patchouli Oil. Each one of these ingredients are great for the skin, and the body. After all, this is edible skin care! Click here to read the wonderful benefits of Irish Moss for skin, weight loss, respiratory health, and more! Click here to read the amazing benefits of Vitamin C for your skin. I wrote a previous post about the benefits of Patchouli Oil.  After reading the benefits of each of these, you may want to eat this stuff by the spoonful. Go ahead! =)

Most of the recipes I give on my blog have very inexpensive ingredients. However, these products seem to be a little more costly up front. However, I want to point out to you that the picture of the 1/2 pint jar only cost $2.32 per batch. If you leave out the Patchouli Oil, it is only $1.32 per batch. Image how much a bottle that size would be on the market! Have you ever even seen a anti-wrinkle serum come in an 8 oz. bottle? You are usually lucky if you get 1 ounce!

I order the Irish Moss here. I order the Truly Vitamin C here, and I have a private source I order my Patchouli Oil from that I hope to be able to post soon. Until then, Young Living is a good source for high quality oils. You can also check other online sources, just be sure they are a good quality before purchasing. Do not be fooled by the cheap stuff!

This pretty much wraps up my all natural homemade skin care line. Thanks for following. I just want to sum things up by giving you a general rule of thumb when it comes to choosing or making your own skin care.  The only rule: IF YOU WON'T EAT IT, DON'T PUT IT ON YOUR SKIN!  Simple enough? Whatever you put on your skin, DOES get into the body!

Have a happy, healthy, frugal day!

Check out this site to find lots of frugal ideas for Mother's Day!


Saturday, April 28, 2012

All Natural Homemade Facial Mask


I covered this a little in the post on acne treatment. The recipe is basically the same, however, like all my skin care recipes, you adapt the essential oil to what your needs are for your skin type.

Mask

2 parts water to 1 part clay (don't worry about making too much as you can store it in an air tight container and it will last several weeks)
1 tsp. of RAW honey
5-10 drops of your favorite essential oil


You simply put the mixture on your face the same way you would any mask and let it set for 15 minutes. Take a hot wet cloth and place it on your face to soften the mask once it is dry, then just wash it off. Be sure to follow with toner and moisturizer.


I would add more to this, but it would be repetitive. I discussed all of the benefits of the clay and honey on another post. . .

Stay tuned for the Anti-Wrinkle cream! =)


Wednesday, April 25, 2012

All Natural Homemade Tooth Powder


Recipe

3 T + 1 t. Baking Soda
5 t. sea salt
2 capsules of black walnut
1 capsule of white oak bark
The black walnut kills fungus and the white oak bark removes plaque. We buy our capsules from Nature's Sunshine


This recipe was given to me by a very special friend who is an elderly lady. My kids call her grandma and she lives in the apartment attached to our house. She is a wealth of knowledge when it comes to health, nutrition, and frugality! However, this is the recipe she makes for her. In order to make a larger batch you start with being to sure to use double the amount of baking soda as you do sea salt. As far as the capsules, I don't know the exact amount to adjust to, but just make sure you always use 1 or 2 more capsules of black walnut then you do white oak bark.


 Obviously, this wouldn't be anywhere close to what we would need for our family of 8. This is one recipe I have not convinced my husband to use yet, and my children weren't too thrilled about it. They are getting used to it though. I haven't started using it regularly yet as I am still finishing up my supply of tooth soap. Personally, after using tooth soap for the past few years, I really enjoy the taste of the tooth powder. Of course, that is from an opinion of a person who has not used traditional toothpaste for years.


 If you are transitioning from toothpaste it may take some getting used to. If it helps you any, you should know that traditional toothpaste has fluoride in it along with artificial sweeteners (how else do you think they make the toothpaste sweet?), and other nasty chemicals that are known carcinogens and neurotoxins. You may ask, "But I thought fluoride was good for you and helps to strengthen your teeth?". I'm so sorry you have been lied to and do not yet know the truth! Read the truth here! Please stop being brain washed by dentists, doctors, society, and old, outdated information. Please stop giving fluoride to your family!


Oh, and don't forget to floss everyday! =) Enjoy your new, healthy, non-toxic, beautiful smile! =)

Monday, April 23, 2012

All Natural Homemade Acne Treatment

Ok, I first have to get on my soapbox for acne before I give my topical treatment for it. There are several factors involved in why people get acne. Topical treatments alone are NOT the solution. Topical acne treatments should be accompanied with internal treatments like what we eat, drink, and how we balance our hormones.

Click here to read 10 very common reasons we have acne breakouts in the first place. The first thing I would say to cut out is any refined sugars. Yes, this means soda!!  The link I gave has a lot of great information on how sugar and dairy can cause acne.

Now off the soapbox and onto what I use for my teenager's acne and mine on occasion. It only takes two simple ingredients and of course one is an essential oil. I use Tea Tree (aka Melaleuca) oil mixed with Master's Mircale II Neutralizer Gel. You might ask after reading so many posts, why I use the gel for so many skin care products.Well, many of these oils can just be put on the skin directly, many cannot as they would burn the skin. However, with my acne treatment and cold sore medicine, I like to use the gel so that the oil stays put on the skin for a longer period of time. Also, the Neutralizer Gel has many amazing benefits for the skin as well. It helps to regulate the proper pH balance of the skin that causes so many skin conditions including acne, age spots, wrinkles, and more.

I also have my girls use a mask or spot treatment using Bentonite Clay
Below is a recipe for both:


Treatment

3-4 ounces Neutralizer Gel
15-20 drops of Tea Tree Oil

Mask

2 parts water to 1 part clay (don't worry about making too much as you can store it in an air tight container and it will last several weeks)
1 tsp. of RAW honey
10 drops of Tea Tree oil

You can either put it over the entire face and use it as a mask (let dry 15 min.), or spot treat the acne and even sleep in it. 

I plan to have another post on this mask, but the reason I wanted to be sure to add it to the acne treatment post is because both the clay and the honey add a very important element to eliminating acne. When Bentonite clay is added to liquid it develops a mild electrical charge that helps it to draw out toxins, heavy metals and other impurities away from the skin. You can read more of the benefits of this clay on acne here

Honey is well known for it's strong antibacterial and anit-inflammatory properties, and it has been used as a treatment for wounds and other skin conditions for decades. However, it is important that you use a raw honey. Many brands of honey go through a process that includes heating the honey to such a high temperature that it will kill of the properties that carry these important properties.

Like I said before, changing the diet is the most important factor to eliminating acne. I realize there are severe cases in which special treatments may be needed. Consult with your physician in these cases.


Friday, April 20, 2012

All Natural Homemade Skin Moisturizer


Moisturizer. . .One of the more expensive skin care products on the market, but also one of the most important. As usual, mine is simple, easy to make, all natural, and inexpensive.


The base is Virgin Coconut Oil (4 oz.)
15 drops of Patchouli Oil
5-10 drops Lavender Oil
15-20 drops vitamin E oil
Mix all the ingredients together. Keep in mind that coconut oil solidifies when it is cold and melts when it is warm. 

I also wanted to mention that everything I use on my face I also use on my neck and hands. A very small amount of the moisturizer goes a long way, so this amount last a LONG time. I love the smell, and my skin feels like silk after putting it on. 

I wrote a previous post that gives a long list of  benefits of Patchouli oil. 

Lavender is good for:

  • Pain relief
  • Headaches and migraines
  • Muscle aches and sprains
  • Menstrual cramps
  • Allergies
  • Asthma
  • Relaxation
  • Anxiety
  • Depression
  • Inducing sleep
  • Digestive distress, gas and colic
  • Inflammation
  • Burns
  • Insect bites
  • Chicken Pox
  • Acne treatment
  • Dermatitis
  • Insect repellant
  • Dry skin
  • Muscle relaxant
Enjoy! =)


Thursday, April 19, 2012

All Natural Homemade Skin Toner


Aaahhh. . .looove the feeling of my skin toner. . . I feel such a sense of relaxation and spa like experience when I use my line of skin care products. I'm sure most of that is attributed to the fact I use essential oils in each product I make. My toner is one skin care product I make that does change every time I make it. For now I use the following:
3-4 oz. of Miracle II Neutralizer Gel
10-15 drops of Eucalyptus Oil
5-10 drops of Patchouli Oil (not pictured)

I love the smell of Eucalyptus and the many benefits it has. 


Benefits of Eucalyptus Oil (to name a few)

  • Treatment of minor respritory illnesses
  • Natural decongestant
  • Massage therapy
  • Antispasmodic
  • Pain relief
  • Sore muscles
  • Rids dandruff
  • Stress relief
  • Helps to relieve depression
  • Air Purifier
  • Relief from drowsiness / Fights mental exhaustion
  • Deodorant
  • Natural bug repellent


Patchouli has a way of bringing me to nature! I love the aroma of Patchouli and the natural musky smell! After reading the benefits below, you will see that it has a massive variety of benefits.


Benefits of Patchouli:
  -helps relieve stress and controls depression & anxiety
  -helps treat skin problems like eczema, psoriasis and dermatitis
  -antiseptic (protects the wounds from infection)
  -acts as a fungicide
  -
has anti aging properties
  -helps in healing wounds
  -prevents acne and scars
  -wonderful for dry skin and wrinkles

  -a refreshing deodorant and cooling astringent
  -musky and spicy aroma helps to keep away the irritating body odor
  -induces contractions in muscles, nerves, skin and works as an effective astringent
  -helps prevent sagging of skin, and loosening of muscles.

  -insecticidal properties to help keep insects away
  -use it in a diffuser  to help remove mosquitoes, ants, beg bugs, and fleas
 
 
-help cure inflammation, burns, cuts and boils
  -helps in weight loss, lowers cholesterol, and flushes out toxins
  -helps to cure cough, nausea, colds, headaches, diarrhea, and abdominal pain

  -treats infections causing fever
  -helps boosts immune system 


Wednesday, April 18, 2012

All Natural Face Wash

You'll learn that I am a very simple, basic woman who LOVES to make life easy and all natural! My face wash is simple. . .I use one of two products as a base; Master's Miracle II Moisturizing soap or Dr. Bronners Castile soap. I find the MM doesn't dry my skin at all. Dr. Bronner's costs about $35 a gallon and MM costs arounc $50 a gallon. However, the MM is VERY concentrated and can be made into 2 gallons or even more!

Now comes the tricky part. All skin types are different and even our individual skin changes from time to time. With each skin type requires a different essential oil. I put Patchouli, Lavender, or Peppermint in mine. I usually don't put more then 2 in at a time. I start with about 3-4 ounces of soap and add 10-15 drops of oil.

I have made a list of oils I own that I feel are good for the skin. I am linking each one to the benefits they have for your skin so that you can make an educated choice for your own skin. Tea Tree  Grapefruit Lavender (scroll towards the bottom of this site to see benefits for skin) Eucalyptus (does great with lavender) Patchouli Peppermint and Elemi (scroll down a little on this site).

My personal favorites for face wash is Patchouli or Elemi.


Tuesday, April 17, 2012

Cold Sore Medication~Putting Myself Out There

If you have read any of my previous posts, you know that I had a major tooth ache a few weeks ago and ended up having oral surgery to have a wisdom tooth removed. Well, that wisdom tooth was attached to the one next to it, so I had to have TWO removed. :( The dentist really had a rough time getting them out and the proof was on my face! Well, the stress on my mouth brought on a VERY bad cold sore, one so bad I could barely open my mouth.

Now the picture I have below is just 3 days before the cold sore reared it's ugly head (April 6th), so the cold sore showed up on the 9th and continued to grow until the 11th or 12th (it usually never grows that much, but due to the surgery, my immune system was pretty low).  I put my homemade cold sore medication on it right away! I have tried everything for my cold sores and nothing works as good as this! Abreva doesn't help me much at all! This is me really putting myself out there!

The beauty of this formula is that it only has two ingredients, but it is NOT for the faint of heart as it does give a little burn to the skin. However, the burn is no worse then the pain of the actual cold sore!
I use a very small bottle the size pictured in the hand sanitizer post.

I would guess it is about 1 oz. I fill the bottle with Miracle II Neutralizer Gel and put in about 15-20 drops of Armor Oil. That simple!

 I have pictured here the Thieves oil as it is the same thing, just more common. The Armor Oil is just as good a quality, but MUCH less expensive! I order it from an individual person who does not have a website. I will be posting her email in a few days. My Master's Miracle soap and Neutralizer I buy from an individual as well (I find better prices this way). Her email is zozula@lhtot.com. She has the best prices I have ever seen for these products!

Below is how quickly my face healed only FIVE days after the cold sore stopped growing. Keep in mind that I put the cold sore formula on every few hours. Dollar for dollar my formula is WAY cheaper then Abreva!
Once the cold sore is dried up from the cs formula, I either keep my homemade moisturizer on it, or ReNew lotion to help it heal quicker. I am always amazed at how quickly it heals. Also, since I have been using this formula my cold sores are getting farther and fewer between. I used to get them 3-4 times a year and now I get them only 1-2 times a year. AmAzInG!!


Monday, April 16, 2012

All Natural Homemade Hand Sanitizer

Sorry it has taken so long to continue the posts for the homemade skin care line. Four of my children were involved in the play Suessical this last weekend and we have been busy!

The first skin care line I wanted to start with was the Hand Sanitizer. I stopped using hand sanitizer a long time ago because of the negative side affects. Click here to find out why you should not use commercial hand sanitizer. That link will also give you another recipe for homemade hand sanitizer, but I prefer to use one w/out alcohol. Also, it talks about the Thieves brand hand sanitizer. This is a very good and safe brand, but it is very pricey!

I am sorry to say I don't have an exact recipe for this formula, as I never use recipes for anything (including cooking). I will tell you the ingredients I put in and give you an approximate amount of each. Adjust this formula for your personal needs or likes. 

~I start with a base of Miracle II Neutralizer Gel ( I fill an old 2 oz hand sanitizer bottle, not pictured)
~about 15 drops of  Armor essential oil (a less expensive form of Thieves oil)
~5+ drops of peppermint essential oil
~very TINY amount of Miracle II Soap
~very TINY amount (small squirt) of ReNew lotion (optional, but be sure to use an all natural brand)

Shake it really well and you're set! I love the smell and feel of it. The 2 oils I put in it are a great antibacterial AND anit-viral without killing the good germs. I give out small bottles of this for Christmas presents to friends, and they love it! =)

When I began my minimalist journey, I switched to a much smaller purse. However, I wanted to still be able to  have the essentials that every mom needs like a first aid kit, hair things, comb, lotion, and hand sanitizer. Instead of having a bottle of lotion and a bottle of hand sanitizer, I put a small amount of each into a contact case. I never need more then that amount at a time and it is very compact!


Tuesday, April 10, 2012

Busting the All Natural Produts Myths!

When I discuss with people the concept of using all natural products I am often faced with these exact words, "I would use more all natural products if they weren't SO expensive!" Convincing people that all natural is better isn't the battle, it's convincing them it doesn't have to be expensive!

First, I had to convince myself! When I dove into natural living, I replaced products slowly because of the high cost. When I finally switched to an all natural skin care line I broke the bank! That couldn't happen again! There had to be another way! I decided to develop my own all natural skin care line. I went to work and did a lot of research. To my surprise, I had a lot of the products at home already. 

If this overwhelms you, don't let it! I already did the research for you! I'm not here to sell anything, nor am I going to give you an exact recipe as mine are different each time I make a batch. However, I will give you the basic ingredients and you can adjust it for your own skin type. Please keep in mind, some of these products may seem expensive up front, but they go a loooong way and can even be split with others. Here is a picture of the skin care products I make. I do not make the tooth soap, but I now make my own tooth.powder!

This post would be far too long and too much time and effort to put the ingredients for every all natural product I make, so I will do a series of posts with each products ingredients. Below is a lists of the skin care products I make and will give you the ingredients for. Click on each item to take you to the link for the ingredients and instructions and on how to make them.


Just to prepare you, four of these products have a base of Master's Mircale II Neutralizer Gel


Have homemade all natural skin care products you want to share? Post below!


Tuesday, March 27, 2012

Homemade Deodorant


Ok, so this one isn't exactly on the frugal side as much as it is for the natural and healthy side. Deodorant for the most part is pretty cheap and ounce for ounce this homemade stuff isn't cheaper. However, of all the products we put on or in our bodies, deodorant is one of the WORST!

First off, our bodies were built to sweat. As a matter of fact, we should sweat everyday! Sweating releases toxins from the body. When we force toxins to stay in the body under our arm pits we force a toxic build up in the lymph nodes. NOT good people! This is a controversial subject, but some even believe this can cause breast cancer. That, I am not sure of, but. . .

If you are just not open to the idea of no deodorant or natural, at least get a deodorant that is not anti-perspirant and that does not contain aluminum. You also need to discover what it is that is causing your body odor. Is it your diet? For the most part, people should not have a bad odor. You can also cure odor from the inside out. Besides eating a healthier, non toxic diet try taking Chlorofresh (a combination of chlorophyll & sage). The more chlorophyll we take in the less toxic our bodies and the less bad odor we will produce.

All of that being said, I do make my own spray on deodorant that I use on occasion. I honestly don't have to use it everyday though.

Recipe:
Thai Crystal Deodorant Mist in a small spray bottle (don't know the exact size, maybe 2oz.)
15 drops of Armor Oil (aka Thieves),
10 drops of peppermint oil
5 drops of citrus fresh oil (optional, & I don't use it every time).
Since I don't use it on a daily basis, it really does last pretty long.

The Armor oil contains cinnamon, lemon, clove, rosemary, and eucalyptus, and all of these ingredients are anti-bacterial and have potent antimicrobial properties. The peppermint oil is a natural antiseptic. This deodorant still allows you to sweat, but the oils kill off the bacteria that is causing the smell. It also smells wonderful!

I always keep peppermint in may purse to freshen my breath and to help with digestion. Copy and paste the following link to read more about the benefits of peppermint http://www.newsmax.com/FastFeatures/health-benefits-of-peppermint/2011/03/02/id/388097

Monday, March 26, 2012

The No Shampoo Challenge (the proof)

I wanted to show a picture of exactly what I use and how I do the baking soda/vinegar to wash and rinse my hair. There is a picture of the size of bottle I use. I poke a hole in the top of the lids so we can squeeze the mixture out instead of dumping the entire mixture on. It doesn't really matter how you do it, that is just how we prefer it. I also wanted to post a picture of my daughter's hair to prove how beautiful the mixture makes your hair look. This is my 14 yo dd who has not used shampoo in her hair for 2 months now.

There is a previous post on the recipe. Also keep in mind that each person may need a different formula for their hair. This is the formula that works for us. We all have either long and or thick hair. You may need more or less. I also want to point out that for some people there is a transition period. Just be patient and keep trying it. I didn't have one, but my 15 yo dd did.

As far as my hair is concerned, I have not used shampoo for nearly 3 months now. My hair has never felt cleaner or been more soft.I used to have to put some kind of product in it in order to keep it from being frizzy. I have curly hair, and with this method my hair is slightly curlier and it is never frizzy. I stopped using all commercial products all together (another savings).

If you have any questions or comments please leave a comment or send me an email.

For those who have been emailing/commenting me for the recipe, here is the link.


Sunday, March 25, 2012

How to Make Homemade Wet Wipes or baby wipes.

I've been using this recipe since my teenage girls were babies! I loved using them because I KNEW what was in them and what was going on my baby's skin. The wet ones are not super cheap although they are a lot cheaper then the store bought ones. It is and was more important to me that all natural ingredients are being used when it comes to the skin of my darling children. There is also a great satisfaction that comes from making your own products for your family.

I stopped using them for the longest time because I didn't have a need for "wet ones". However, I found myself wishing I had some in the car, my purse, and in the bathroom. I keep them in the bathroom for the times when my girls are too tired/lazy to wash their face. They use the wet wipes to wash their face at night or in the morning. Again, the picture tutorial is self explanatory, but I will post the recipe. Also, when I made them years ago, I actually would have dh cut the roll in half, put them in a round bowl, then pull the center out (after it was wet), and would then pull the wipes out from the center. That is probably the quickest and easiest way to do it, but we don't make the mass amount now like we used to. My girls actually enjoy helping me to make these.

1 roll of good paper towel (the cheap stuff doesn't work well) I use Brawny select-a-size (102 sheets)
2-3 cups of water (depending how wet you want them)
2-3 Tbs. Dr. Bronner's Castile soap (baby mild formula)
1/4-1/2 t. vitamin E oil (optional)
10-15 drops of favorite Essential Oil (optional, I didn't do this when I used it for my babies)
Be sure to pour the mixture in a few different layers (bottom, middle of wipes, and top of wipes). They will not be saturated at first, so let them set for a while with the lid on and all of the towels will get wet eventually.